If you’re just starting out in the intricate world of beer-making, you’ll quickly come across the term ‘gravity‘. Among the various technical terms you’ll encounter, ‘gravity’ stands out as a fundamental concept that underpins the brewing process. You may wonder, what does gravity have to do with beer? It’s not about the gravitational pull of the Earth, but rather a measure of the density of your brew relative to water, providing vital clues about its sugar content, fermentation progress, and potential alcohol content.
In this guide, we aim to demystify the term ‘gravity’ as it relates to beer. We will explain what it means, the difference between Original Gravity and Final Gravity, and the significance of gravity in the beer-making process. Moreover, measuring gravity accurately is pivotal for consistent and high-quality brewing outcomes. Therefore, we’ll also introduce you to the essential tools of the trade, from hydrometers to refractometers, ensuring you’re well-equipped to embark on your brewing adventures with confidence and expertise.
Beer Gravity Meaning
In the context of brewing beer, “gravity” refers to the specific gravity of the wort or beer, which is a measure of its density relative to water. The specific gravity indicates the amount of dissolved sugars present in the liquid, which are essential for fermentation by yeast. There are two main measurements of gravity in brewing:
- Original Gravity (OG): This is the specific gravity of the wort before fermentation begins. It gives the brewer an idea of the potential alcohol content of the finished beer. A higher OG indicates a higher potential alcohol content, assuming the yeast ferments most of the sugars.
- Final Gravity (FG): This is the specific gravity of the beer once fermentation has finished. It indicates how much of the sugar has been consumed and converted into alcohol and carbon dioxide by the yeast.
The difference between the OG and FG can be used to calculate the approximate alcohol content of the beer. A larger difference typically indicates a higher alcohol content because more sugars have been converted into alcohol.
In addition to helping predict alcohol content, gravity readings can also help brewers understand the efficiency of their mashing process (which extracts sugars from malted grains) and monitor the progress of fermentation.
How To Measure Beer Gravity
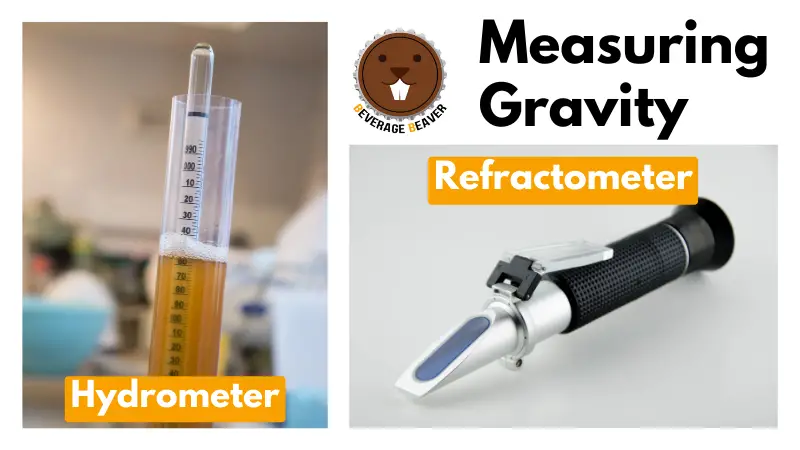
To measure gravity, brewers often use a hydrometer, a calibrated instrument that floats in the liquid. The level at which it floats indicates the specific gravity of the liquid. Another instrument, called a refractometer, can also be used, especially for OG measurements, as it measures the refraction of light through the wort, which changes with sugar content.
Here’s a step-by-step guide on how to measure beer gravity. To do this, you’ll need a hydrometer or a refractometer, a sample jar or test tube to collect your sample, and a thermometer to measure the temperature of your sample.
Using A Hydrometer:
- Sanitize Your Equipment: Ensure your hydrometer, sample jar, and any other equipment are sanitized to avoid contamination.
- Draw a Sample: Using the sample jar, draw enough wort or beer to float the hydrometer, ensuring it doesn’t touch the sides or bottom of the jar.
- Check the Temperature: Measure the temperature of your sample. Most hydrometers are calibrated to 60°F (15°C). If your sample is at a different temperature, you’ll need to adjust your reading.
- Float the Hydrometer: Gently place the hydrometer into the sample jar. Give it a little spin to dislodge any bubbles that might affect the reading.
- Take the Reading: At eye level, read the number where the surface of the liquid crosses the hydrometer. This is your gravity reading.
- Adjust for Temperature (if needed): If your sample isn’t at the temperature your hydrometer is calibrated for, use a temperature correction calculator to adjust your reading.
- Record Your Reading: Always jot down your measurements and observations for future reference.
Using A Refractometer:
- Sanitize Your Equipment: Ensure the refractometer is clean and free from residues.
- Calibrate the Refractometer: Use distilled water. Place a few drops on the sample plate, close the cover, and look through the eyepiece. The reading should be 0 Brix or 1.000 specific gravity. If not, adjust according to the manufacturer’s instructions.
- Draw a Sample: Place a few drops of your wort or beer on the sample plate of the refractometer.
- Take the Reading: Look through the eyepiece and note where the boundary line intersects the scale. This will give you a reading in Brix, which can be converted to specific gravity using an online calculator or conversion chart.
- Record Your Reading: As with the hydrometer, always document your findings.
How To Calculate Alcohol By Volume (ABV)
Alcohol by Volume (ABV) gives you an indication of the amount of alcohol present in your beer compared to the total volume of liquid. Here’s a guide on how to calculate ABV using the Original Gravity and Final Gravity measurements:
- Measure the Original Gravity (OG):
Before fermentation starts, take a gravity reading of your wort. This is your OG. - Measure the Final Gravity (FG):
Once fermentation is complete, take another gravity reading. This is your FG. - Calculate the Alcohol By Volume Using the Standard ABV Formula:
ABV=(OG−FG)×131.25
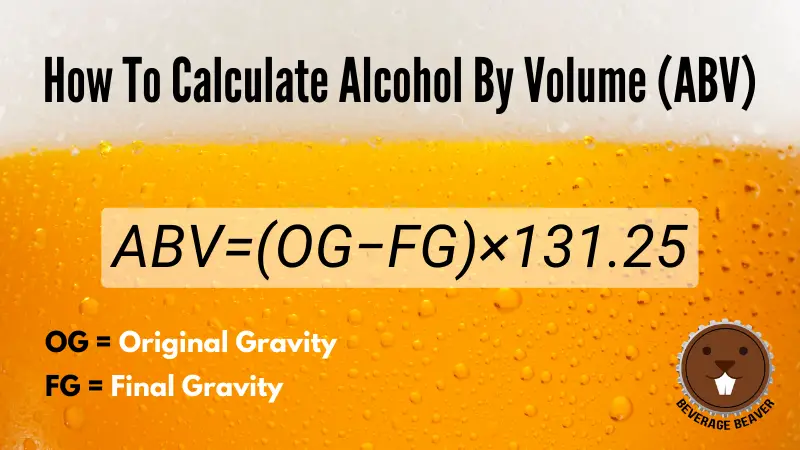
For example, if you have an Original Gravity of 1.050 and an Final Gravity of 1.010 the calculation would be, ABV=(1.050−1.010)×131.25=5.25. Your beer would have an ABV of approximately 5.25%.
Gravity and Beer Styles
Gravity, specifically the Original Gravity (OG) and Final Gravity (FG), plays a significant role in determining the character and style of a beer. As beer enthusiasts or brewers, understanding these gravity ranges can give us insights into the potential alcohol content, mouthfeel, sweetness, and overall character of the beer.
Gravity Ranges and Beer Styles
Different beer styles have evolved over time, each with its unique signature of flavors, colors, and other sensory characteristics. The OG and FG of a beer provide a framework for understanding and categorizing these styles:
- Lagers and Light Ales: These beers typically have a lower OG, often ranging from 1.030 to 1.040. Their FG is usually relatively low, resulting in a crisp and light beer, perfect for those who enjoy a refreshing drink without an overpowering taste of alcohol.
- IPAs and Pale Ales: IPAs, especially the modern American versions, often have an OG ranging from 1.050 to 1.070, with some even pushing the boundaries further. They finish relatively dry, making their FG lower and amplifying the perceived bitterness.
- Stouts and Porters: These beers can have a broad range of gravities. For example, a dry Irish stout might start at an OG of around 1.040, while a robust imperial stout might have an OG over 1.100. Their FGs vary based on the desired sweetness and body, with some finishing quite sweet and full-bodied and others being drier.
- Barleywines and Strong Ales: These are among the heavyweights in the beer world, often starting with OGs above 1.080 and sometimes even crossing 1.120. Despite their high alcohol content, many have a high FG, retaining sweetness that balances out the warmth of the alcohol.
Beer Strengths
- Session Beers: These beers are designed for prolonged drinking sessions where the drinker can have multiple glasses without becoming overly intoxicated. Session beers typically have an ABV less than 5%, often resulting from a lower OG.
- Regular Strength Beers: This category encompasses a vast majority of beer styles. They usually have an ABV ranging from 5% to 7%, striking a balance between flavor complexity and drinkability.
- High Gravity Beers: Also known as “big beers” or “strong ales,” these beers start with a high OG, often leading to an ABV of 8% and above. They’re full-bodied, complex, and meant to be sipped and savored, much like one would with a fine wine or whiskey.
Beer Gravity FAQ
What is gravity in the context of brewing?
Gravity in brewing refers to the relative density of the wort or beer compared to water, mainly driven by the dissolved sugars from the malt. It’s a vital indicator of potential alcohol content, fermentation progress, and the beer’s final body and sweetness.
Why do brewers measure gravity?
Brewers measure gravity to monitor the sugar content in the wort, track fermentation progress, calculate potential alcohol by volume, and ensure consistency across batches.
What’s the difference between Original Gravity (OG) and Final Gravity (FG)?
OG is the gravity reading taken before fermentation starts, indicating the sugar content in the wort. FG is taken after fermentation has completed, representing the sugars left unfermented. The difference between OG and FG can be used to calculate the alcohol content.
How does gravity affect the taste of beer?
Higher FG often results in a sweeter, fuller-bodied beer since not all sugars are fermented. A lower FG typically leads to a drier, lighter beer. The OG can provide insight into the potential strength and character of the beer.
Can I measure gravity without a hydrometer or refractometer?
While hydrometers and refractometers are the standard tools for measuring gravity, without them, estimating exact gravity becomes challenging. It’s highly recommended to use the proper tools for accurate readings.
Wrapping Up
From determining the sugar content to predicting the alcohol level of the finished product, gravity plays a pivotal role in shaping the character and quality of your beer. Now that you know what gravity means, and how to measure the Orignal Gravity and Final Gravity of your beer, you can perfect your skills at brewing beer. Here’s to many successful brews and the joy of crafting beers.